Welcome: WOWTOPGIFTS CO.,LTD


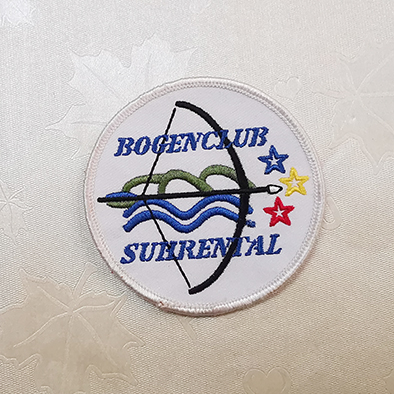
Want to add some personal style to your favorite denim jacket or bag? Buttons, pins, badges and embroidery patch floral are a fun and popular way, and DIY embroidered patches are actually easy to make! You can buy some tide embroidery patches, there are many choices, but the beauty of DIY making embroidery patch stickers is that you can have any pattern and style you want, and fully display your personality.
This tutorial will introduce you to two ways to create and add clothing embroidery patches. Which method to choose depends on the size of your patch. There are no restrictions on this, but first of all, smaller designs, such as the elements of this fruit pattern, work well. Although there are 2 different ways to make patches, you will find that you can mix and match some tricks. For example, you can use adhesives to make felt patches or use different stitches. You can try these 2 DIY embroidery patch production processes separately and have fun!
The first type of felt stitching embroidery patch
This embroidered patch style trims the felt very close to the embroidery pattern because the felt does not wear like other fabrics. It is also more convenient to thread the needle on the felt. To embroider on the felt, mark the pattern with a tracing paper. Be sure to arrange the embroidery position so that there is enough space around the embroidery pattern to trim the patch. No matter how you like to embroider. Satin stitching on a small patch looks great, but you can also embroider only the outline. After the embroidery is completed, remove the mark. If you use the tracing method, carefully remove the paper. If you are using wool or wool-blend felt (which can be kept at its best), it is important to use cold water or room temperature water when soaking the embroidery. Warm water will shrink your patch.
Next, cut out the real patch. You can loosely follow the shape of the stitch shown or cut out a regular shape, such as a circle or a hexagon. The sample has nearly a quarter of the felt display, so there is plenty of room to sew the patch onto something. But you can cut it closer. Just make sure that you don't see the stitches to prevent the embroidery pattern from falling out.
To sew the felt patch on the garment, fix the patch in the position you want and embroider it around the edges with a plain embroidery thread. You can use blanket stitches or whip stitches. Felt patches should not be cleaned frequently.
Second removable pin patch
For those who just want to temporarily decorate the embroidery patch, why not make a pin that looks like a badge? This method is also very suitable for gift giving! It looks simple and generous and is very convenient to use. Simply transfer the embroidery pattern to the fabric and stitch it. In this example, the cloth provides some fill color for the embroidery. This embroidery pattern allows you to cut any shape you want, then cut a piece of felt that matches the shape of the embroidery piece. On the back of the mat, a strip of stitching is sewn.
Fix the two layers together and use a three-strand embroidery thread to start a whip stitch around the edges. Hide the starting knot between the layers, coming out from behind. Down to the front, the pins are very close to each other. They should look like satin. When your line is exhausted, fasten it with a knot near the felt. Once it is sewed, it can be fixed on the jacket, bag, sweater, etc.!
How to make clothes embroidery patch, now have ideas?
 Joy
Joy